Setup Bitbucket Repository in cPanel
Bitbucket is a git based source code management (SCM) platform built for team collaboration to make code development simple and easy. Learn how to setup Bitbucket private repository in cPanel instead of traditional file uploads via file manager clients.
Git repository in cPanel has it benefits like it provides a centralized source for changes in code. Pulling changes in cPanel repository is way easier and faster than manual file uploads. This post explains step by step how to configure git repository in cPanel. Before you start make sure you have:
- Git Version Control support in cPanel.
- Terminal enabled in cPanel. Required for creating SSH keys etc.
How to Clone Git Repository in cPanel
It is easy and simple to clone a repository in cPanel. Following are the main steps to clone git private repository in cPanel:
- Create a Bitbucket repository.
- Create SSH Keys in cPanel.
- Assign SSH Keys to Bitbucket repository.
- Clone Bitbucket repository in cPanel.
Create a Bitbucket Repository
- Login to your Bitbucket account.
- Navigate to correct workspace. If you need select different work space click on user avatar icon on top right. Then click "All Workspaces".
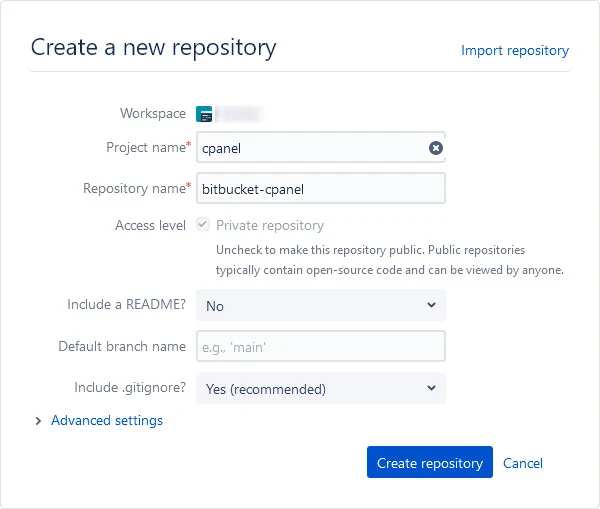
- Click on "Create" button in top menu and then click "Repository" in dropdown.
- Select a project or create new one.
- Enter a name for repository.
- Check Access Level to Private Repository.
- Click "Create repository".
Create SSH Keys in cPanel
Now that we have created our repository we need SSH keys to generate before cloning the repository.
- Login to your hosting server's client area and navigate to cPanel.
- Open "Terminal" and run this command to generate SSH key:
ssh-keygen -t rsa -f ~/.ssh/bitbucket-cpanel -b 4096 -C "bitbucket-cpanel"
-t rsa: indicates the algorithm of SSH key.
-f ~/.ssh/bitbucket-cpanel: indicates the name of SSH key including the path where key will be stored.
-b 4096: indicates the size of SSH key.
-C "bitbucket-cpanel" indicates a comment for SSH key. Useful in case you have multiple keys for different repositories. This comment will help to identify the key.
After you have run this command it will ask for passphrase leave it empty and press enter twice. - Run this command to create SSH config file
touch ~/.ssh/config
- Run this command to change permissions of SSH config file.
chmod 0600 ~/.ssh/config
- Run this command to change the user of SSH config file.
chown user:user ~/.ssh/config
Replace user in "user:user" with your cPanel user name. - Now open ~/.ssh/config file in file manager and add the following to file
Host bitbucket.org
AddKeysToAgent yes
Hostname bitbucket.org
IdentityFile ~/.ssh/bitbucket-cpanel
Assign SSH Key to Bitbucket Repository
Now that we have created our SSH keys we need to add it to our Bitbucket repository. So head back to Bitbucket repository.
- Click "Repository Settings" in left side menu.
- Click "Access Keys" in left side menu.
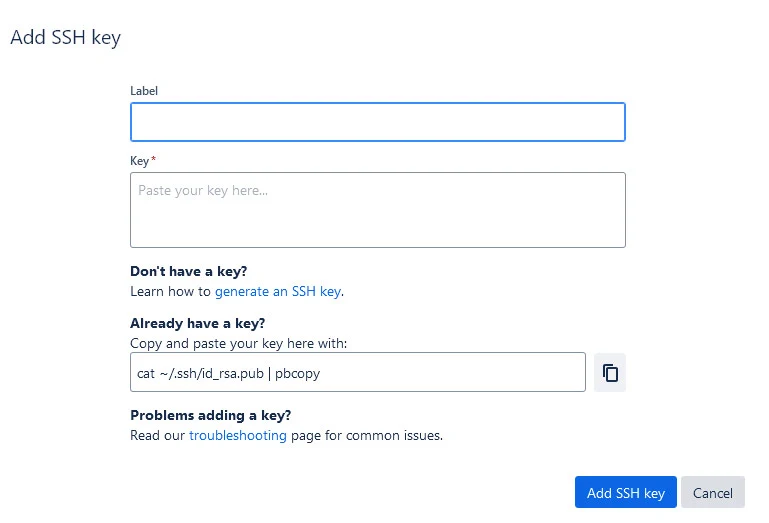
- Click "Add Key" button.
- Enter a nice descriptive label for key.
- Copy and paste the contents of "~/.ssh/bitbucket-cpanel.pub" either by opening it in cpanel or running the command "cat ~/.ssh/bitbucket-cpanel.pub" which will output the content of key file in terminal. You can copy it from terminal.
- Finally click "Add SSH Key".
Clone Bitbucket Repository in cPanel
Now that we have added our key in Bitbucket we can clone the repository in cPanel in two different ways one is cloning it via Terminal command and other is using the Git Version Control tool of cPanel.
Clone Repository via Terminal:
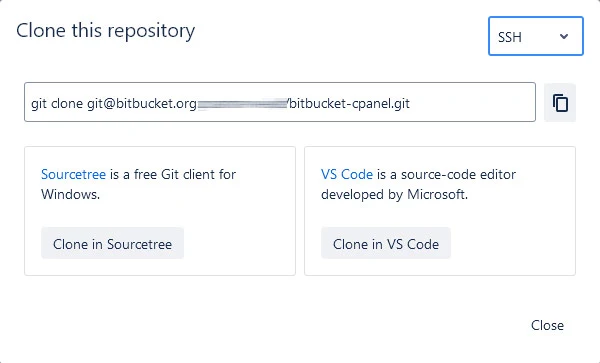
- Go to repository home in Bitbucket.
- Clone the SSH URL of repository in from clone modal.
- Head back to cPanel terminal.
- Navigate to directory where you want to clone this repository.
- Paste the clone command you copied from Bitbucket.
- Wait for cloning to complete and that's it.
Clone Repository via Git Version Control:
I personally recommend this way to create/clone repository via Git Version Control Tool. As it will also create logs of commits and pulls. To clone repository via Git Version Control Tool:
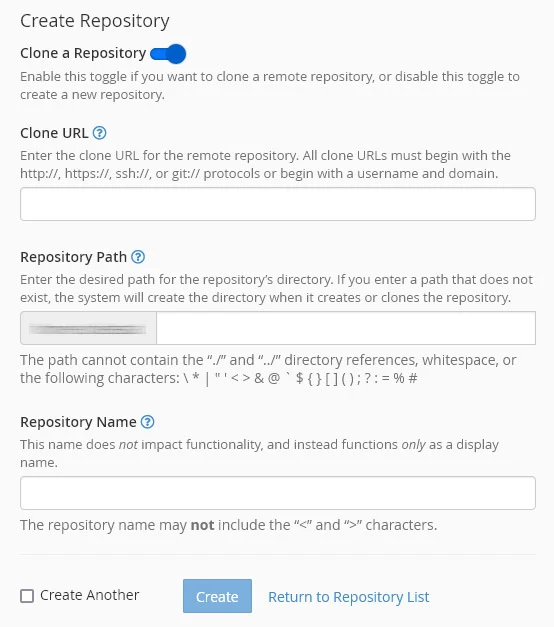
- Go to Git Version Control under "Files" section of your cPanel Tools.
- Click "Create" button.
- Turn the option "Clone Repository" on if its not on by default.
- Enter the clone URL of your repository in URL field. The URL should be in this format "[email protected]:username/bitbucket-cpanel.git" where username is your Bitbucket username.
- Once the repository is detected the "Repository Path" and "Repository Name" will be automatically filled. You can still change it as per your directory structure.
- Click "Create" and that's it.
You can now pull changes in cPanel repository manually accessing the Terminal or via SSH Agent from your local machine. In next posts we will implement auto deployment for this repository so whenever changes are pushed to this repository it will be updated in cPanel as well.
